Managing Looks, Metadata and Camera Control with Jürgen Painczyk
The role of a DIT changes a lot depending on which responsibilities you choose to carry on a production. Many factors play a part, like the size of the production or the country you're working in. For the most part, I feel the DIT role now touches on making sure devices using RF are managed correctly. One might argue that this role belongs to the sound department or the video operator. Often we don't realise the RF chaos on a film set, because this invisible world isn't something you encounter at prep. It shows up when every device is switched on and you're rolling your first shot. Odd things happen: your Hi-5 handset loses connection in a critical shot, or you pull iris and it actually dims a light on set.
The fight for a dedicated highway for wireless information is real. This is where Bit Part brought out the bitbox, working on a low RF frequency to give us a fighting chance to control cameras, relay metadata and manage looks across various devices.
Their impact on every production isn't just making a DOP's life easier, it's letting 1st ACs and DITs control camera settings with ease. I've used them in many different configurations. Here are some examples:
- Poor man's Livegrade at camera prep. Choosing and crafting a look for commercials via CDL and LUT management in camera with Livegrade, where time is limited. I often end up grading on the fly with my laptop and a small monitor on set connected via bitboxes, especially on two-camera jobs where there's no time to set up a DIT station. The LUTs live in the camera OCF files and can be extracted later in Pomfort Silverstack or LAB.
- Controlling SmallHD Cine 24 monitors via Livegrade on a Snapdragon commercial in tricky locations.
- Camera control on Steadicam-only commercials where the DOP wants to change settings quickly from an iPad mini and the shooting pace is really fast.
- Camera control in the U-Crane on car commercials. I have a layout built for this so the DOP has permanent control of the camera settings, and doesn't have to put that burden on the 1st AC all the time.
A low frequency wireless Ethernet solution like Bit Part's bitbox is an essential tool on every job! I don't go anywhere without my set. How useful they are is best explained through a real-world example.
Skylark
On a production we just finished, our on-set video workflow had to adapt to a new shooting location almost every day. Across all of those changes, the look had to be controlled internally in the cameras so that any change carried through to the onboard monitor, the camera live signal via the DIT cart, and the DOP's lighting monitor.
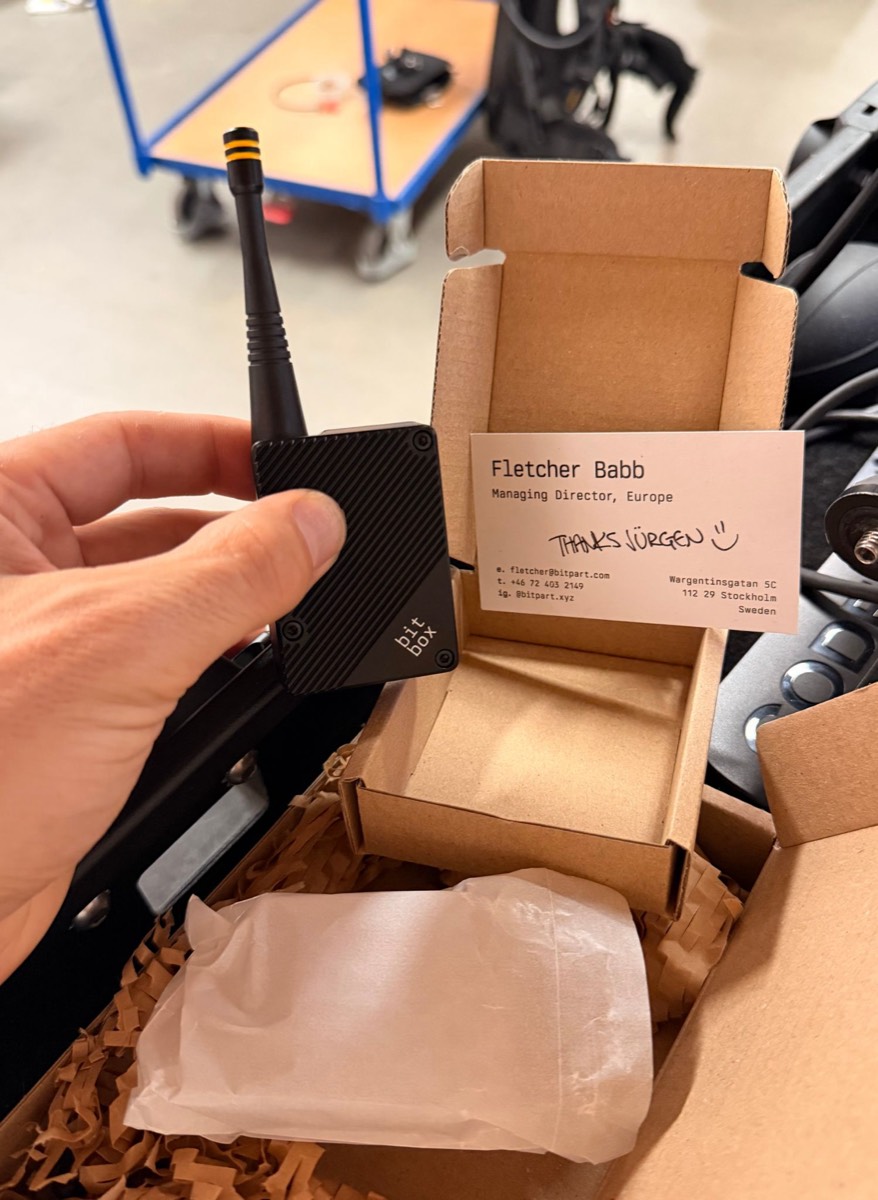
BUT FIRST!... I needed a smaller bitbox because the whole shoot was planned to be handheld, and the 1st AC wanted to reduce weight as much as possible. The bitbox mini was perfect for this. :)
The challenge: two creative LUTs and a LUT that needed WVO wireless video
We shot on the ARRI ALEXA 35 and chose ARRI's WVO (Wireless Video Optimization) workflow because our two demanding creative LUTs were causing wireless artifacts in dark and grey gradient areas of the image. These still appeared even with tetrahedral LUT interpolation.
The looks were contrasty and built very specifically for this job, which meant both had the potential to react aggressively in certain lighting conditions and needed to be monitored closely. Look management was essential for these LUTs to work as the DOP intended.
That created two requirements:
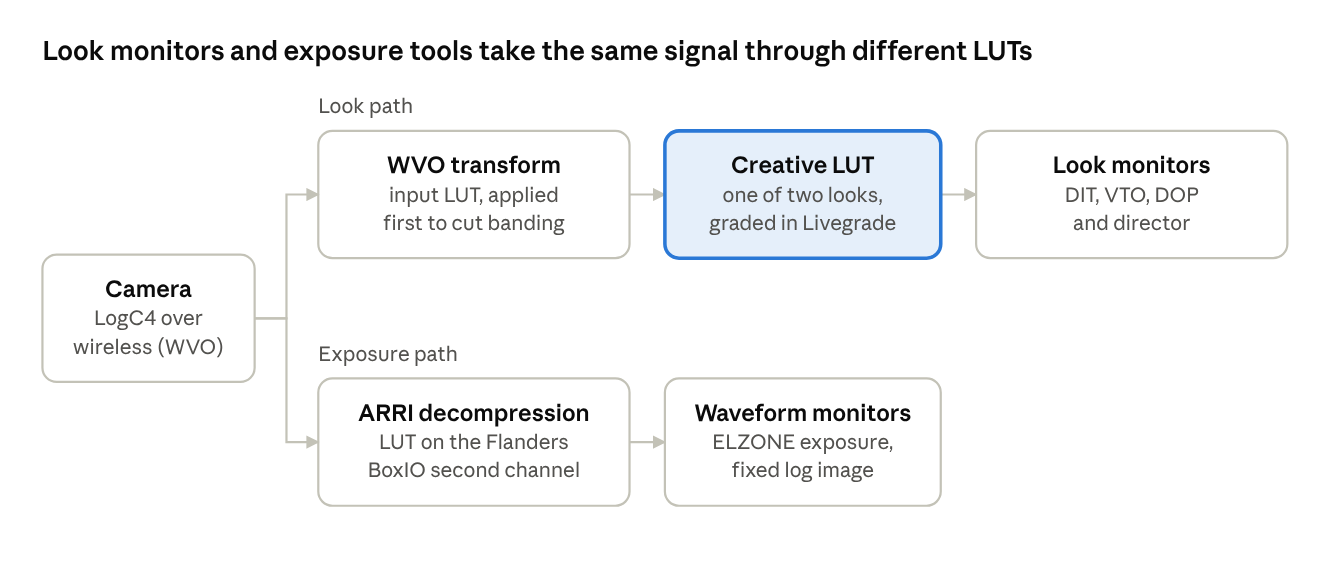
- Every monitor needed two LUTs, in order: the WVO transform input LUT first, then the creative LUT, combined via on-set LUT boxes for consistency throughout production.
- Exposure tools needed a fixed log image: we lit with the ELZONE stop-lighting system, which requires a fixed log image in the colour pipeline. So the ARRI decompression LUT had to be applied before the signal reached the waveform monitors.
The catch: a 1D LUT can be managed inside Livegrade, but not on the colour science managed by the Cine 7 for exposure, because ELZONE locks the incoming log feed. Richard solved this with the dual channel mode on the Flanders BoxIO. Then there was the legal versus full range problem when loading the WVO LUT into the Teradek receivers: the log feed through the WVO LUT did not give the same ELZONE reading as LogC4 straight out of the camera SDI. We had no time to test this properly to make sure it worked.
Wish list for SmallHD: it would be great to have the WVO workflow built into the colour workflow system of all SmallHD monitors.
The on-set colour pipeline
Three DIT setups
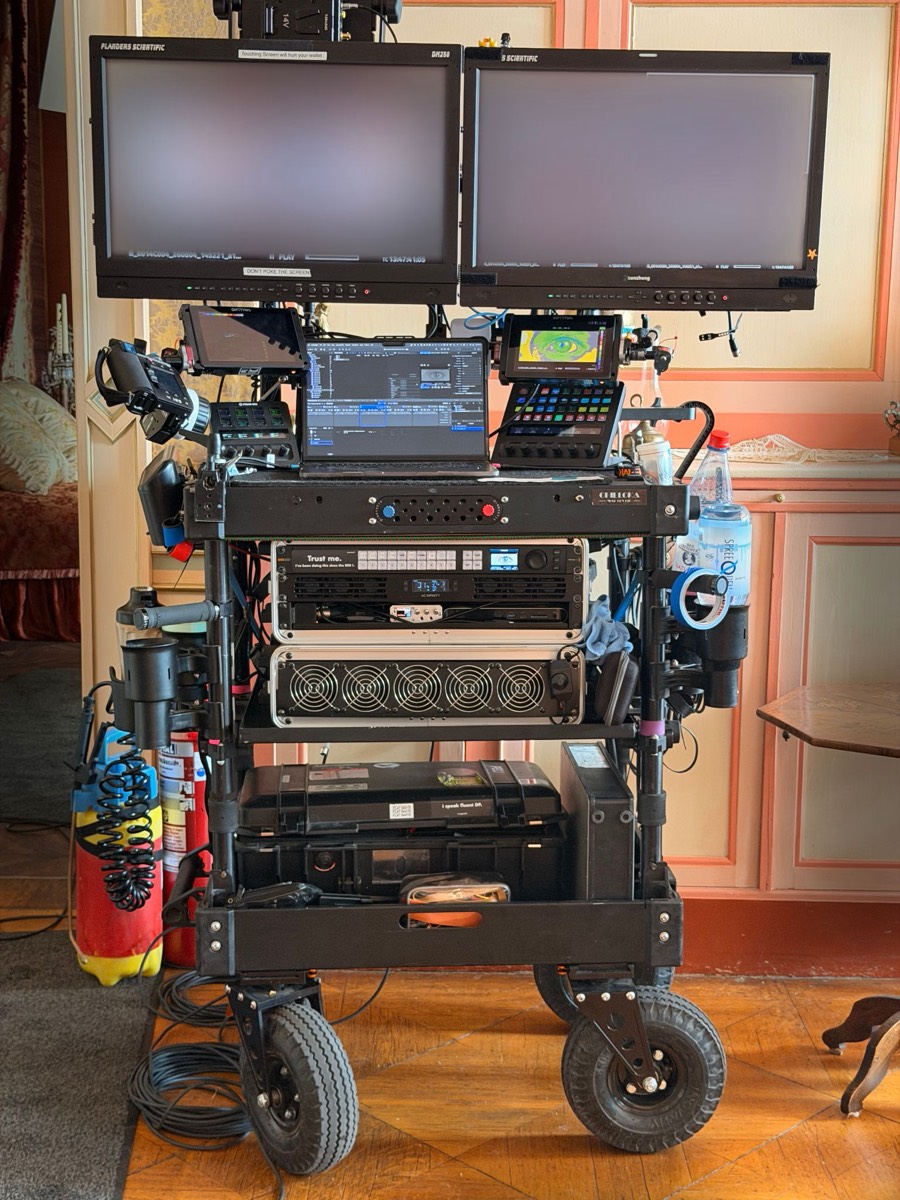
We ran look management from three Livegrade setups, scaled to how much gear each location allowed, or how much we could carry.
| Setup | Monitoring | Video I/O | Routing | bitbox |
|---|---|---|---|---|
| Full Livegrade cart | 2x Flanders DM250 OLED | Blackmagic DeckLink Duo + card enclosure | 20x20 switcher, 2x Flanders BoxIO | bitbox Base |
| Medium Livegrade | 1x Flanders DM250 OLED | Blackmagic DeckLink Duo + card enclosure | — | bitbox Base |
| Tiny Livegrade | 1x Sony BVM-170 OLED | Blackmagic DeckLink 8K Duo + card enclosure | — | bitbox Base |
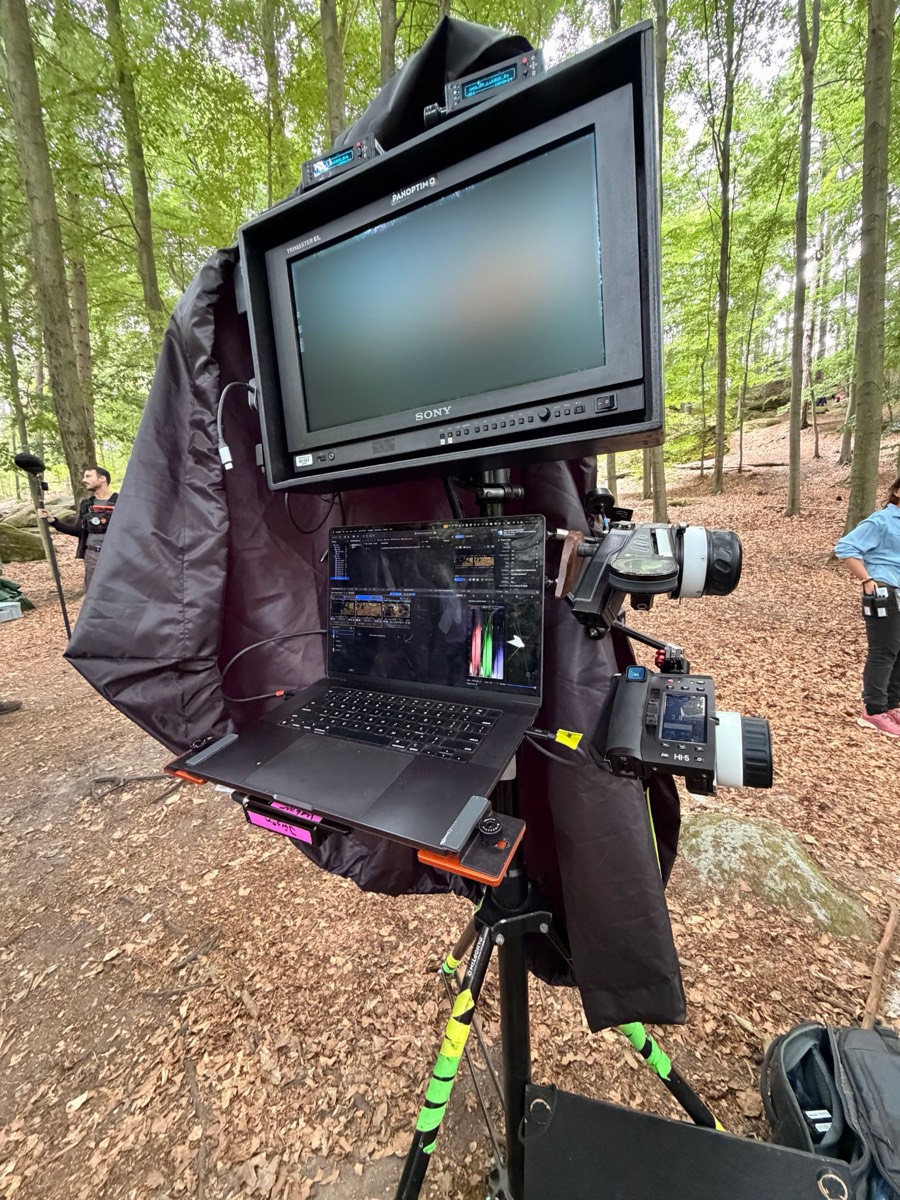
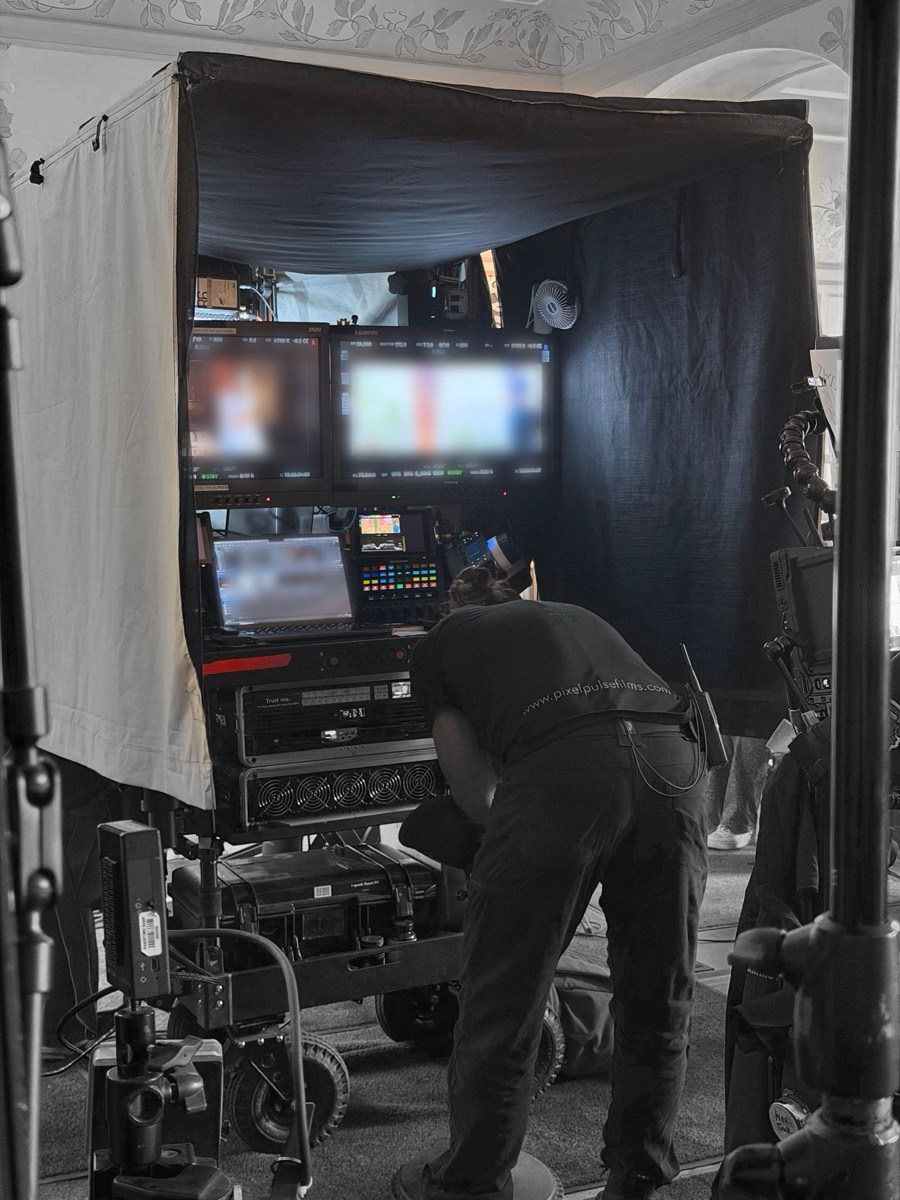
In each setup the bitbox Base handled camera control, injected LUT and CDL information into the camera, and controlled the DOP's Teradek COLR LUT boxes to match.
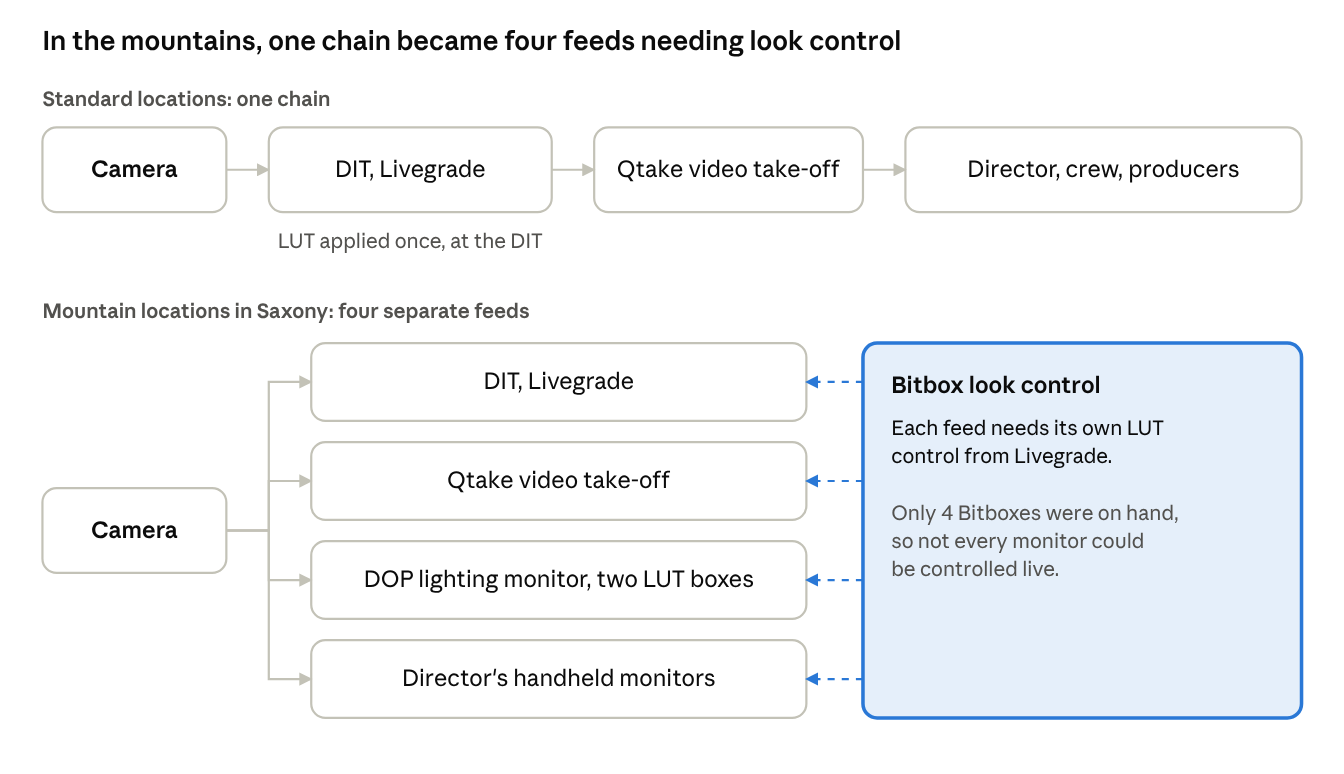
On most days we ran a traditional feature workflow: camera to DIT, then to Qtake, then out to the director, crew and producers. The look was applied once, on the signal leaving the DIT cart.
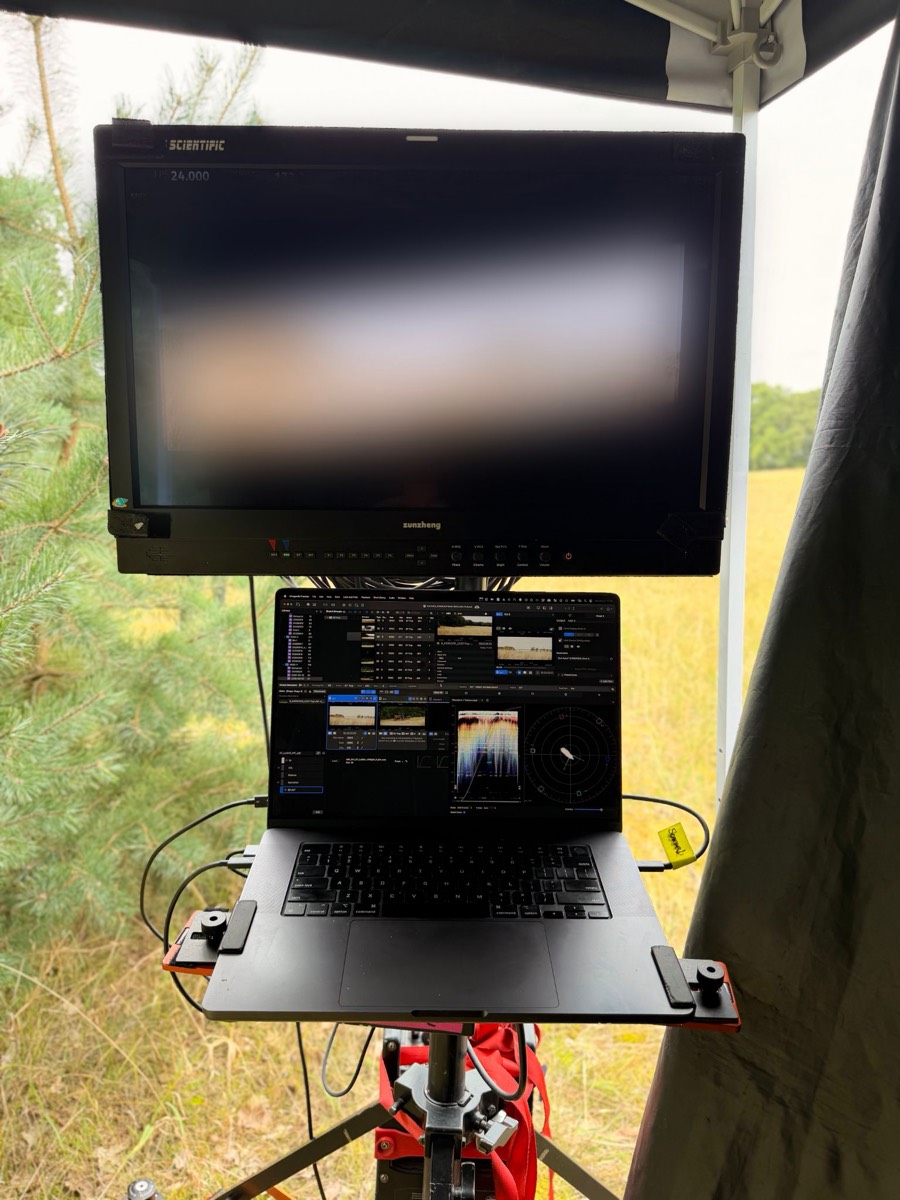
Some locations meant hiking into the mountains of Saxony. There we cut the gear down and fully separated the DIT, video take-off, DOP and director signals, with each camera feed coming straight from a Teradek receiver. At one location, the DOP monitor doubled as the Livegrade station where we managed LUTs and exposure. In places like these it simply isn't feasible, timewise or physically, to take anything you don't really need.
The roaming DOP lighting monitor
Because we moved so often, and it took time to move gear up and down hills, we had a free-roaming lighting monitor with its own receivers for A and B cameras and its own LUT boxes. It gave the DOP a live, low-latency picture with the look applied, to operate with and to prep and prelight with flexibility in mind.
With a bitbox on the back of the monitor, both LUT boxes could be controlled from Livegrade whenever we needed to make changes. Changes could be discussed on set without the DOP needing to be at the DIT cart, while still keeping wireless control and consistent changes all the way down the video pipeline.
Here's a breakdown of the gear used:
| Item | Qty | Role |
|---|---|---|
| Sony BVM-170 OLED | 1 | Lighting monitor |
| Teradek COLR | 2 | LUT boxes, A and B camera |
| Teradek Bolt 6 RX | 2 | Wireless receivers, A and B camera |
| Bolt 500 wireless with camera control | 1 | Playback from Qtake |
| Ubiquiti 5-port USB-powered Ethernet hub | 1 | Network for bitbox and 2x Teradek COLR |
| bitbox | 1 | Livegrade control of both LUT boxes |
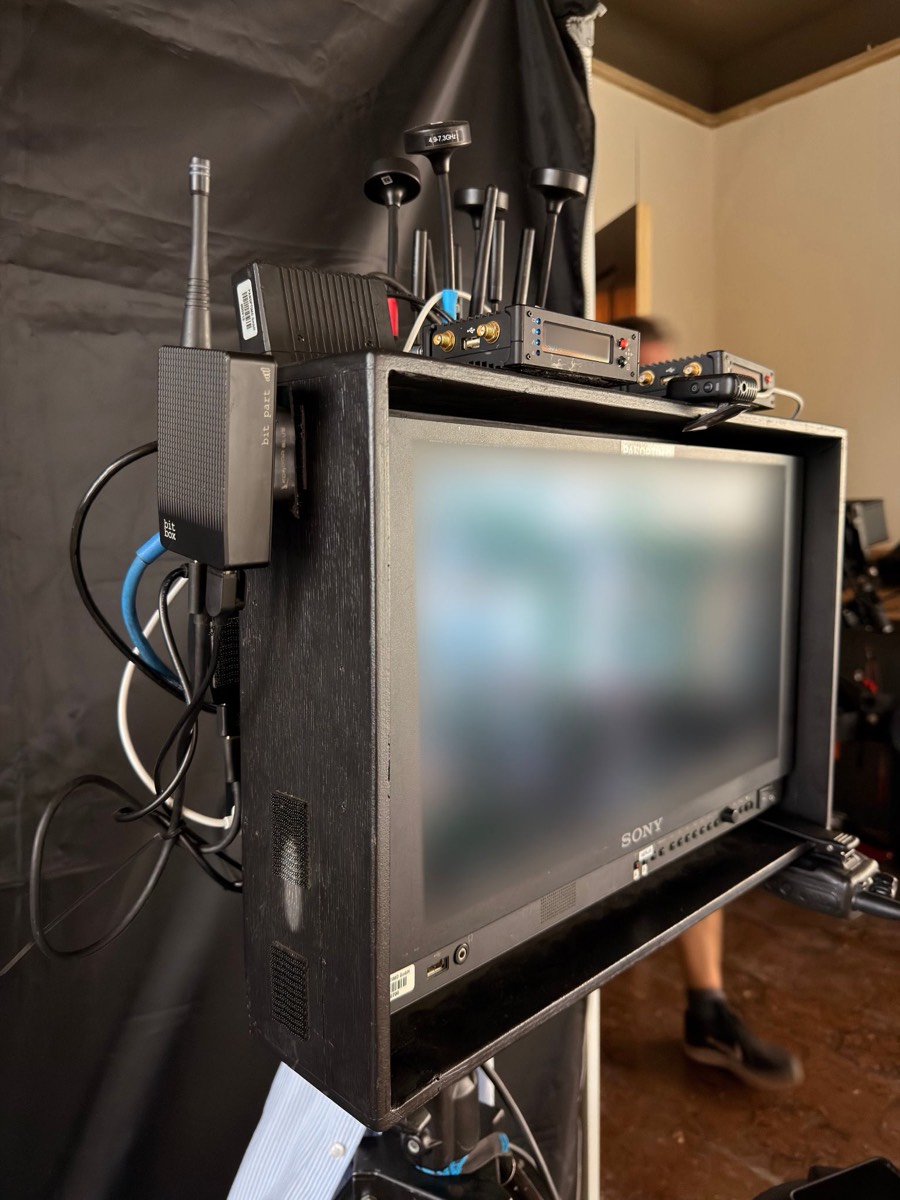
The lighting monitor rig on its stand.
What the bitboxes made possible
Across every setup and location, the bitboxes let us:
- Keep looks in sync with the metadata of the camera original files
- Maintain camera control and metadata management
- Control the LUT boxes on the lighting monitor, and on SmallHD monitors
With only four bitboxes, we couldn't control every monitor on the split setup. With more units, every signal path could have had live look control, within the bandwidth cap.
Fun fact: polarity agnostic power
Polarity agnostic saved my bitbox!The bitbox's 2-pin Lemo 0B power input is polarity agnostic: it accepts 11 to 36 V DC whichever way the two pins are wired (Bit Part specs).
On set, that removes a whole class of problems. Not every 2-pin cable or power source is wired the same way, so we could power a bitbox from whatever was on the cart or camera without checking pinouts.
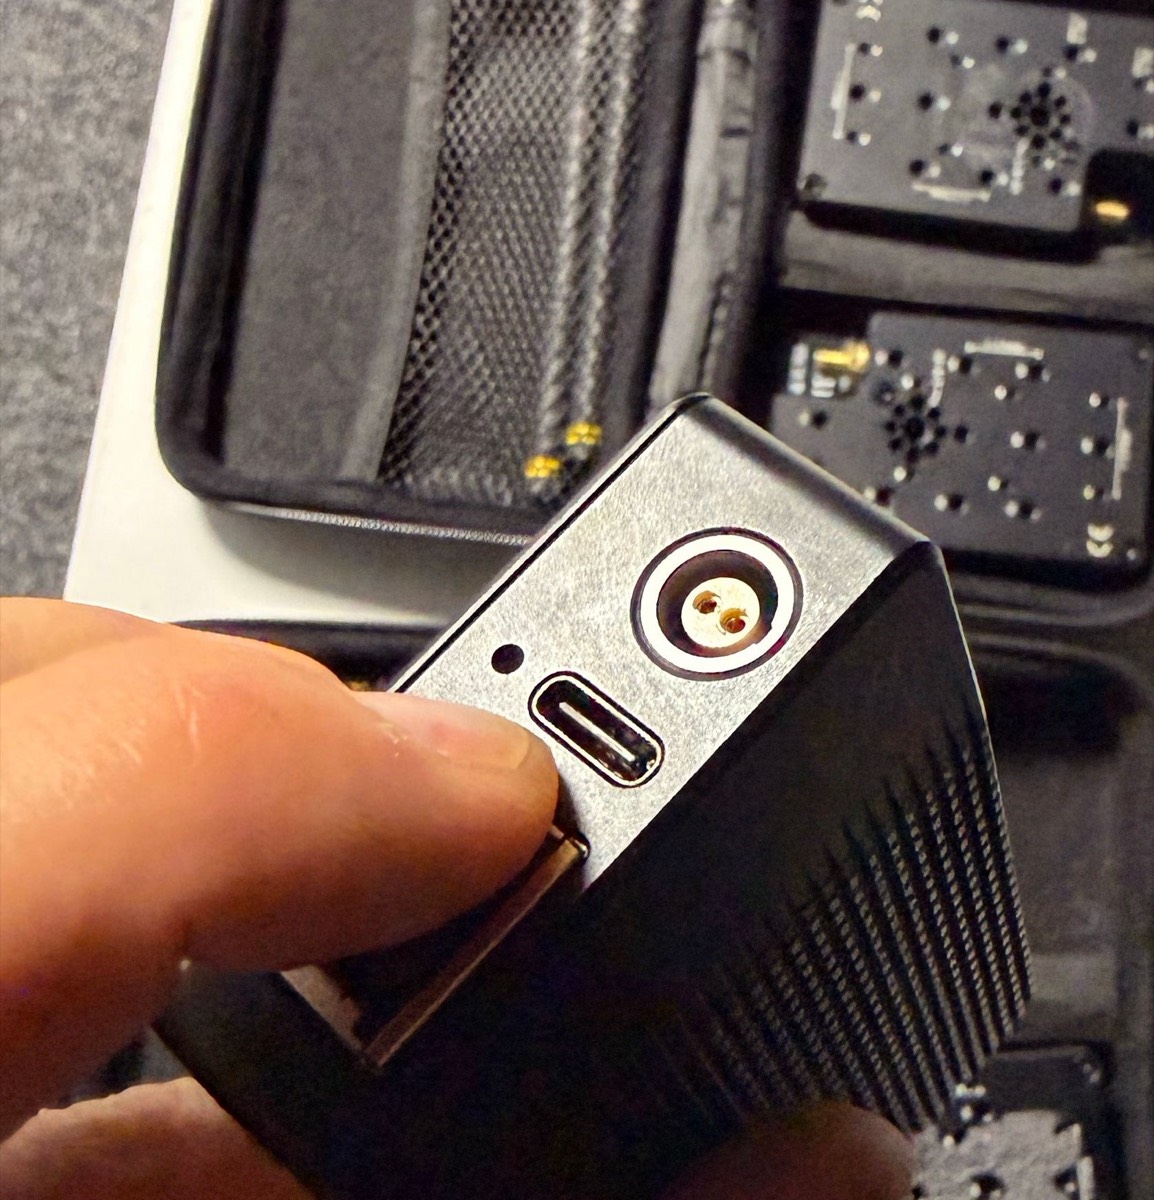
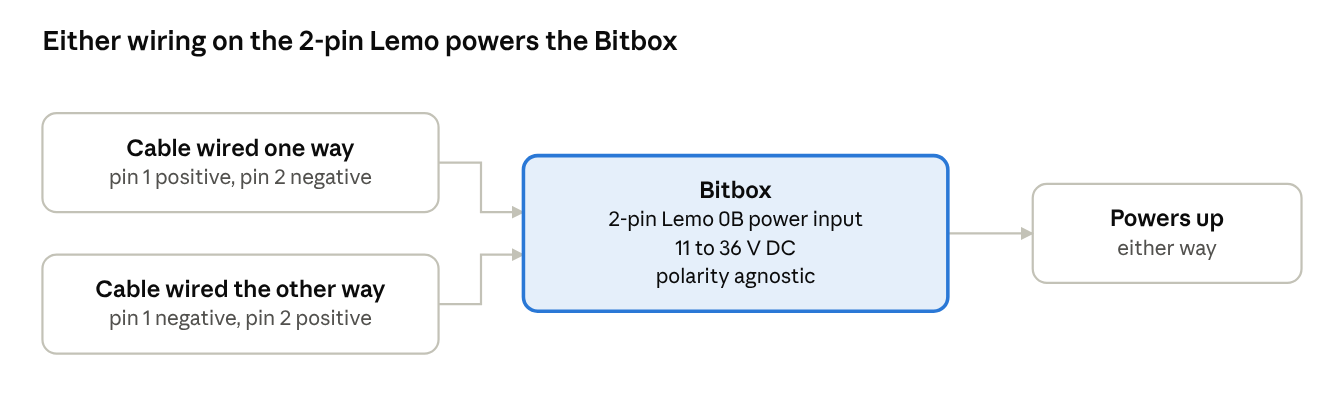
Whichever way the cable is wired, the bitbox powers up and joins the network.
Closing thoughts
Looking back on this project, the bitboxes were the connective tissue of the whole video workflow. Cameras, Livegrade, LUT boxes and monitors all had to talk to each other, and the bitboxes are what made that conversation possible.
Low RF point-to-point technology is a great solution that already lets communication between devices sneak underneath the rest of the 2.4 and 5 GHz traffic. It will be interesting to see what other creative solutions we end up using it for.